Family Crafts to Keep
We all know the struggle. The kids make something at school, or you see something on Pinterest, and now you have a piece of paper mache or cardboard “art” that really belongs more in the trash than on your table. But if you are DIY inclined or if you have kids who are, there are options.
We have combed through the Internets list of ‘fun cute fall crafts!’ to find a few fall crafts that, not only will you actually enjoy doing, but will want to keep for next season.
Note; we have excluded any sharp, dangerous, flammable / candle based projects or anything requiring heavy duty equipment.
Painted Gords

LEVEL ONE. This is the easiest of the projects, which is why we are starting here. During fall you can pick up a bag of non-perishable baby gords (tiny pumpkins and squash) at any craft store, and most supermarkets, for under $10. The gords are picked before they are ripe and will literally last for years as long as they are kept cool and dry (Do NOT put in your attic). These little pumpkins and squashes are hugely popular, so realistically you could just put them in a bowl on the table and call it a day. This is a nice option if you are trying to do this as a craft with the kids and suddenly find yourself overbooked. Things happen, life gets busy, but at least this way you didn’t blow money on a big craft project that you don’t have time for.
There are a thousand and one pattern ideas online; from polka dots to ombre, to splatter paint, glitter, or even drawing with sharpies. If you are not artistically inclined, trying to paint a specific image (like a heart or a star) without a stencil is probably a bit hard. But between stencils, patterns, and color changes, everyone can make something that represents them.
*Top Tips: treat this like an Easter egg project when you think about colors and pattern applications, let paint dry between coats if necessary, think about stencils before you start painting, leaves make great stencils

Rag Wreath
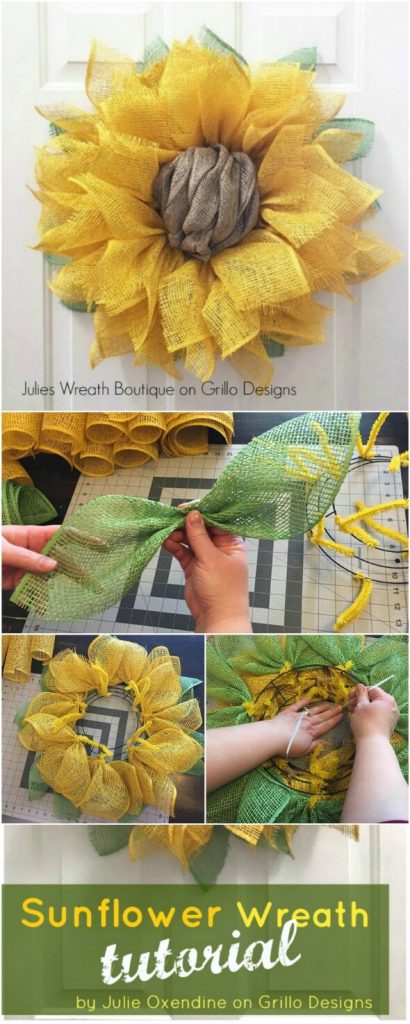
LEVEL TWO in the craft world. These can be done with burlap or bought fabric and a purchased wireframe. Alternatively, you can use a bent wire hanger and whatever fabric you have around; old sheets, shredded shirts, or anything else you don’t mind sacrificing to the crafting gods.
Fall decorations use a lot of reds, yellows, and oranges. Additional accents like leaves, acorns, burlap, or pine-cones are a personal touch. By keeping to general ‘Fall’ themes, this decorative piece can stay up for longer than a single holiday.
Wooden Crates

LEVEL THREE. For some reason, wooden boxes became the decoration de jour for houses across America a little while back. While my compulsive and irrational fear of splinters has kept them from appearing in my home, their crafting potential is undeniable.
‘Craft boxes’ are available at most arts and crafts shops, but can be pricey. Cheaper alternatives are available at places like Five Below at the right time of year. If you intend to keep the boxes outside, they make great side tables, you could do worse than to hit up your local farmers markets for discards.

These boxes can be seasonal decorations or, depending on the design, permanent storage solutions. Personalized bins for communal living areas, toy bins for kids rooms, or easy storage for living room blankets.
For a smooth finish, which is recommended for kids, start with a base coat. Spraying can save time, but doing the second coat with a brush gives a better surface. After that, it is entirely up to you! Revisit some of the design or pattern suggestions we had for painting gords for inspiration, or come up with your own design! You can also incorporate a little bit of sanding to get that cool worn feel to the edges. These are a little more complicated than the gords only because of the much larger surface areas at play.
*Parents, let your kids go wild! If the crates aren’t perfect, no one ever said they couldn’t live in the closet. You can let your kids ‘update’ their box by redecorating the same box every couple of years to keep up with their styles or interests. Or leave one side in the previous pattern and date it as a memento.
Leaf Art

LEVEL FOUR. Congratulations! If you have made it this far, you are ready to try a realm of DIY crafting that can be a little more technical. We have lumped together quite a few different options here, all of which can be done with kids
- Stencils – Pressing leaves against a surface (canvas, wood, paper) and then painting around them leaves a very cool leaf-shaped imprint. Choose an impressive leaf to start with and you will get a better result. You can use acrylic or spray paint (adults only) but need to be careful not to tear the leaf. Tying a string around the stem makes the leaf easier to peel off, which you should do while it is still drying. Try using 2-3 different colors to create a cool multi-dimensional effect.
- Mod Podge – Preserving leaves by pressing them is something people have been doing for hundreds of years (literally). Preserving them for hundreds of years to come through the magic of Mod Podge, well, we can probably blame Martha Stewart for that. Start with a base coat of Mod Podge, apply the leaves, and then add two more coats to seal. Some prefer to use false leaves for this as the real thing can be a bit fragile and must be fully dried before starting, but it’s a preference. This same process can be done on canvas, paper, wood, ceramic, or really any surface where you decided you needed a touch of fall, including the wooden crates mentioned previously.

Shadow Jars
LEVEL FIVE. These lights are great for decorations, ambiance, parties, or as personalized night lights for the kids, but take a little outside of box thinking to really do well. We’ve painted, stenciled, used patterns, and mod podge. But shadow jars are less about the things you choose to add, and more about the things you don’t.
Things to Consider Before Begining;
- Light Source (NO FLAME)
- Jar Size and Material
- Decoration Inside the Jar
- Decoration on the Outside
Shadow jars follow a few general trends, but they all have one thing in common – they all have light.
I recommend anything from twinkle lights to cafe lights to battery-powered tea lights. Just NOT an actual flame. You can use small plastic jars and hang from cafe lights, or medium-sized mason jars for twinkle or tea lights. The important thing is that they should be shatterproof, the lights can’t get too hot, and it should be relatively easy to turn on and off. If you use plastic jars with tea lights you can cut a hole out of the bottom of the jar and secure the tea light with glue so the switch is external.
Depending on what final result you are aiming for, you might choose to add things INTO the jar. Twigs, gauze, tiny plastic fairies (Polly Pocket-sized is best) all of these can be used to cast shadows against the walls, but be sparing. You can’t just look at what you see in the light, you have to imagine how much light will be able to get through in the dark.
Mod Podge is a common choice for shadow jars. Either for attaching pieces like paper mache, netting, or autumn leaves or just to create an antique glass effect when the light shines through. You can use paint on the outside as well, but it needs to be sparing. The more you do to block the light, the less of an impact your shadow jar will have.
Any of these five would make a fabulous addition to your fall decorations for seasons to come! If you are not a regular crafter or are working with kids I do recommend starting with Level 1 and working your way up the ranks as you get more comfortable. There is no easier way to suck the fun out of a project than to try something too far out of your comfort zone and end up more frustrated than excited.
Don’t forget to share pictures of your final results with us here or on social media! We can’t wait to see how they turn out, but don’t forget the most important part is, and always will be, to HAVE FUN. #FallFeeling
Check out this and more original content available every week at TheNerdyNanny.com by subscribing to us on Facebook or Instagram.
You can also check out Eve Daniels, author of The Nerdy Nanny books, on YouTube where she gives writing and academic advice as well as updating you on all of her latest and upcoming projects.


